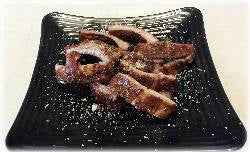
How to Properly Clean Ribs for Barbecue
How to Properly Clean Ribs for Barbecue
How to Properly Clean Ribs for Barbecue: A Complete Guide
When it comes to enhancing your barbecue experience, knowing how to clean ribs for barbecue is essential. Cleaning ribs properly not only ensures that the meat is delicious but also elevates the entire cooking process. With the right technique, you'll impress your friends and family during your next cookout!
Why Clean Ribs?
Cleaning your ribs before cooking optimizes flavor and tenderness, setting the foundation for a perfect barbecue. Ribs often come with a thin membrane and excess fat that can hinder smoke penetration and dry out the meat if not addressed. Here’s why you should clean your ribs:
- Promotes better taste by allowing seasonings and marinades to penetrate.
- Enhances texture, resulting in tender, juicy ribs.
- Reduces cooking time due to a cleaner surface area.
- Improves presentation, making your finished dish more appealing.
Essential Tools for Cleaning Ribs
Before you start the cleaning process for your ribs, gather the necessary tools to make your job easier. Here’s what you’ll need:
- Sharp knife for trimming
- Paper towels for better grip and absorbing moisture
- Cutting board for a stable cleaning surface
- Marinade or rub of choice for seasoning
Step-by-Step Guide to Clean Ribs for Barbecue
Cleaning ribs might seem overwhelming at first, but by following these simple steps, you'll gain the confidence to tackle this task like a pro.
Step 1: Remove the Membrane
The first step in learning how to clean ribs for barbecue is to remove the tough membrane from the back of the ribs. Use a sharp knife to carefully lift one corner of the membrane, then grasp it firmly with a paper towel. Pull it away from the meat, ensuring it comes off in one piece.
Step 2: Trim Excess Fat
After removing the membrane, check for any thick areas of fat. Use your knife to trim away excess fat, which can create flare-ups on the grill and lead to greasy, unpleasant ribs. Aim for a light covering of fat, as it contributes to flavor while cooking, but too much can overwhelm the meat.
Step 3: Rinse and Dry
Once the membrane and extra fat are removed, rinse the ribs under cold water to eliminate any impurities. Pat the ribs dry with paper towels to prepare them for seasoning. This is a crucial step in ensuring that your rub or marinade adheres properly.
Choosing the Right Marinade or Rub
Now that your ribs are clean, it's time to decide how to season them. The right marinade or dry rub can significantly enhance the flavor of your barbecue. Here are a few options:
- Sweet and Spicy Rub: A blend of brown sugar, paprika, cayenne pepper, and garlic powder
- Balsamic Vinegar Marinade: A mixture of balsamic vinegar, olive oil, garlic, and herbs
- Classic BBQ Sauce: Store-bought or homemade, it’s a staple for many rib lovers
- Herb-Citrus Marinade: Using lemon or lime juice with fresh herbs adds a zesty flavor
Marinating and Resting Your Ribs
After applying your chosen marinade or rub, let the ribs sit for at least 30 minutes, or preferably overnight in the refrigerator. This resting period is crucial as it allows the flavors to penetrate the meat deeply.
Common Mistakes When Cleaning Ribs
To ensure a successful clean and preparation process, stay away from these common pitfalls:
- Skipping the membrane removal can lead to tough ribs.
- Not trimming enough fat can cause messiness and undesired flavors.
- Rushing the cleaning process and not taking time to do it right.
- Ignoring marination time, which may result in bland ribs.
Conclusion: Ready to Grill!
Now that you know how to clean ribs for barbecue effectively, it's time to get grilling! Whether you opt for smoking, grilling, or oven-baking, your clean and seasoned ribs will surely be the star of the show. Don’t forget to invite friends and family over to share the BBQ love!
Want to take your barbecue game to the next level? Order the best quality ribs and spices today for an unforgettable grilling experience. Happy cooking!


